How to process photos
This guide on how to process photos is just the tip of the iceberg for photo editing and post-processing, but I hope it will give you a great foundation for processing your photos for posting online. We'll start with photographic file types and the critical difference between lossy and lossless. We'll examine best naming conventions and tips for organizing files. Finally we'll look at processing raw files and bulk processing files in Photoshop.
When you process photos for the web, it's good to keep multiple versions of your files. The highest resolution and best quality of your images is the original file. I like to think of that file like a negative and keep it safe and backed up. If your camera or phone shoots raw files, that’s always going to be the best option.
Handling and processing those original files can be challenging. Making files look good and load quickly is a critical balance to achieve. When uploading files to your website, the goal is high quality and fast speeds for users.
Lossy vs. Lossless
Images in GIF and JPEG formats are lossy, while TIFF, PNG, BMP and raw are lossless. What this means is that GIF and JPEG images are compressed by averaging the information. They become even more compressed each time you open and save them.
GIF and JPEG should only be final versions. When you need new files sizes or output, go back to your lossless original. If your original photos are in GIF or JPEG your first step should be to copy those files somewhere safe and never open the originals.
Naming conventions
Before we get into the steps to process photos, let’s talk about naming image files.
I'm picky, picky, picky about my naming conventions and you should be too for multiple reasons. First, the name stays with your file if it’s downloaded or shared. It’s also a claim of ownership. Finally, it is a ranking factor in SEO.
Google extracts information about the subject matter of the image from the content of the page, including captions and image titles. Wherever possible, make sure images are placed near relevant text and on pages that are relevant to the image subject matter.
Likewise, the filename can give Google clues about the subject matter of the image.
From: Google Images Best Practices
Because of this blog post, I’ve revisited my own naming conventions. Up until today, I named my files using a combination of snake and Pascal cases. Kebab case is the new best practice for the web.
TLDR
- camelCase
- PascalCase
- snake_case
- kebab-case
Process photos in bulk with Photoshop
Process RAW images into TIFF
Open your raw photos in Photoshop. The raw image file type is camera maker dependent. Here’s a list over on Wikipedia. I have a Nikon, so you’ll see that my files are nef. Personally, the Photoshop raw processor is the main place I edit.
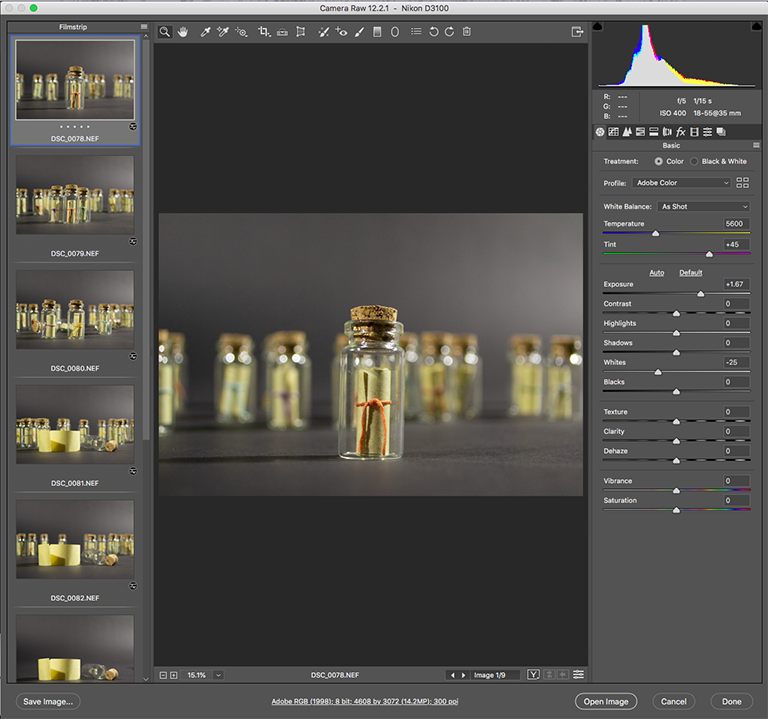
This is the time to look at and adjust how your photo looks.
- White balance
- Exposure
- Levels
- Crop
- Basic rotation or /horizon correction
Here's a guide to processing raw files from Adobe. If my file needs additional touch up, I open it and do non-destructive editing in Photoshop. Alternatively, GIMP has a raw plugin that makes it a good, open source, free substitute.
You can adjust each photo individually, or select multiple to make adjustments to an entire group.
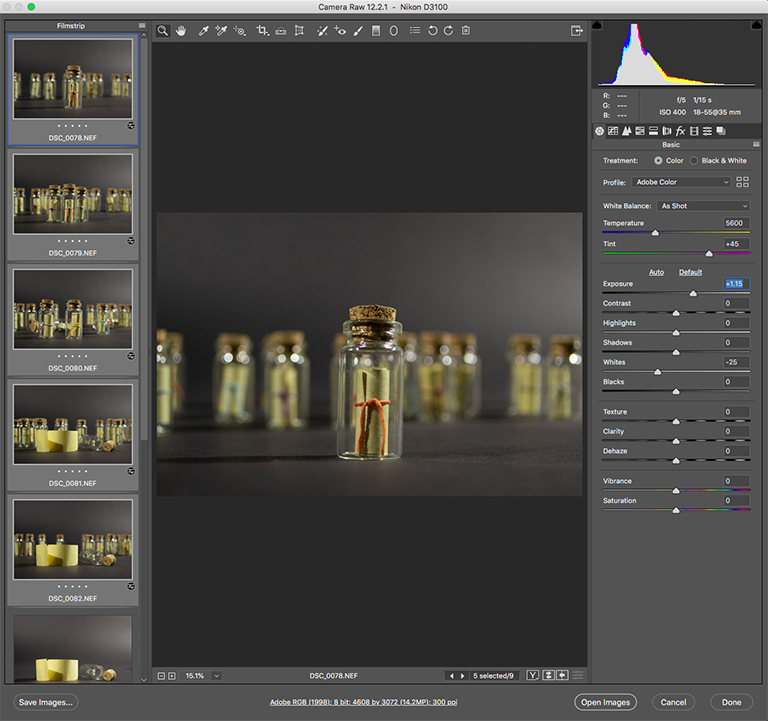
When saving each raw photo, you get the option to change the name. Utilizing my new naming convention, I’ve set up the first part of the to be changed if needed, the second to be my company name, and let Photoshop add automatic numbering. I’m saving these as full sized, lossless TIFF files which will become my new working originals.

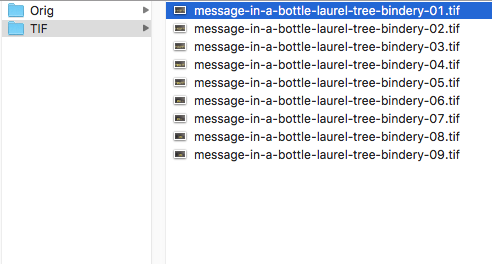
Organize folders for bulk processing
I move my TIFF files into their own folder.
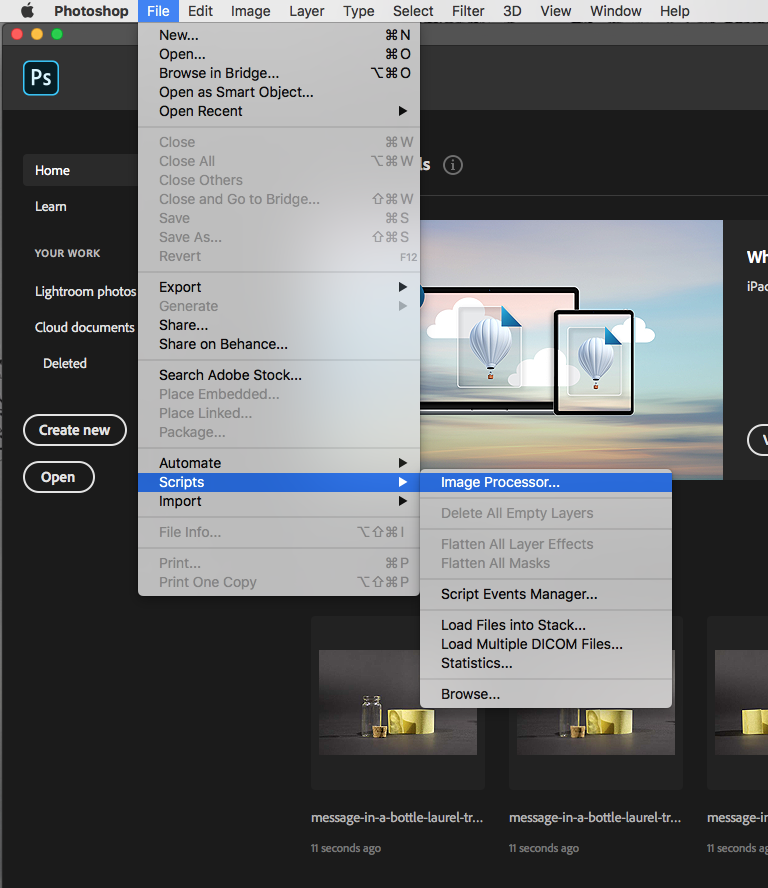
Steps to bulk process photos.
I predominantly use bulk processing to save different sizes of my images and to add copyright information int he metadata.
Go to file menu -> Scripts - Image Processor
Choose size and file options
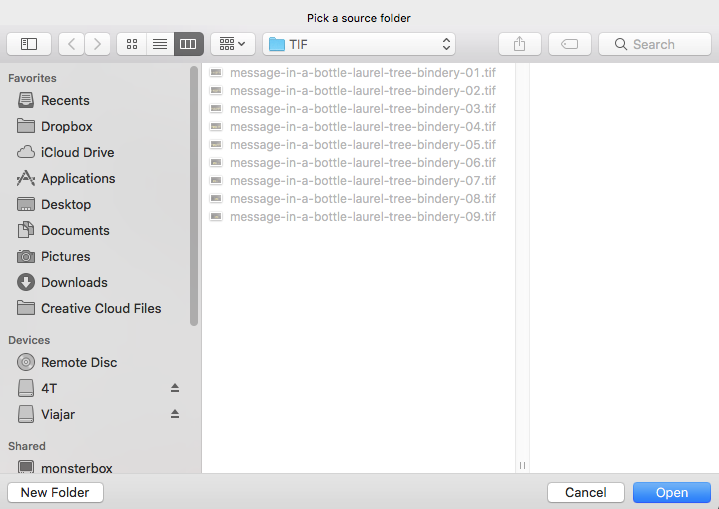
1. Navigate to the folder with the TIFF images.
2. In the second step I use "save in same location” and move them later.
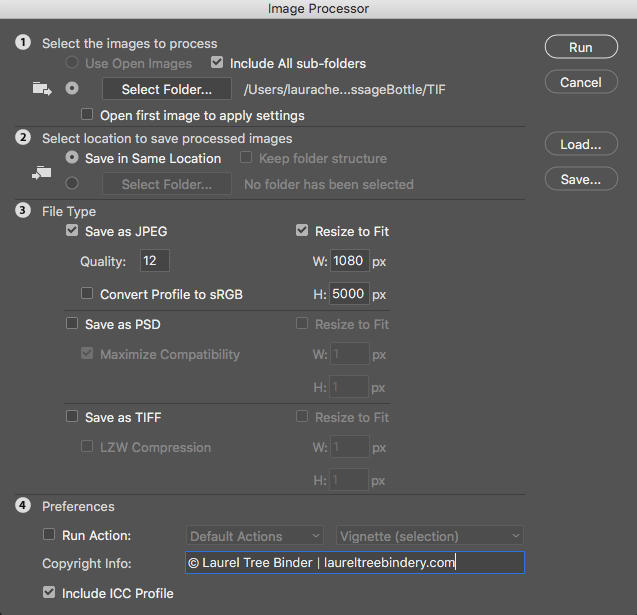
3. In the third step choose your final file type and size:
The options I’ve chosen here: JPEG, Quality 12, Resize to 1080px wide. Height is large enough to be irrelevant. This will not stretch your photos.
TIFF is lossless and a good idea if this is still an interim stage.
Native PSD is really not recommended unless just for your own use.
4. This is where I add copyright information.
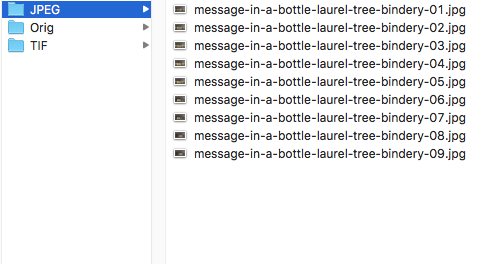
After you process your JPEGs will be in their own folder.
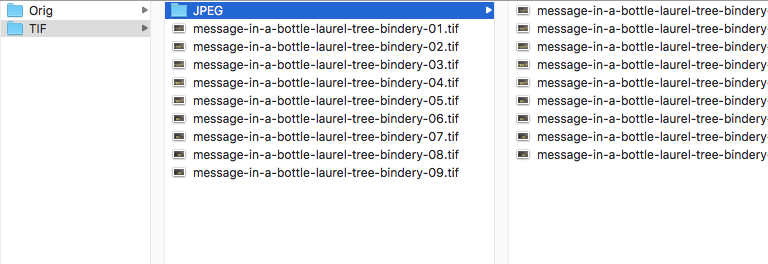
Photo processing results
Your final image size is really dependent on where the file is being uploaded. For example, for Laurel Tree Bindery I actually use a 1080 x 1080 square format. The website then creates and serves up smaller versions for different screen sizes.
I often do end up creating a couple different JPEG end sizes. I will always go back to the TIFFs to create new sizes to submit to shows or to upload to different platforms. I never, ever open and re-save a JPEG. A JPEG is always a final image.
Final thoughts
This is just a basic guide on processing and bulk re-sizing images with Photoshop. Let me know what questions you have or if there are any tips you would like to share.